Wii U
55 archivos
-
Nimble
Nimble es un módulo de configuración de Aroma que parchea las URL de la lista de políticas BOSS de Nintendo Network en una Wii U para usar Pretendo Network en su lugar. Esta lista de políticas se usa para controlar varias funciones del sistema, en particular Wara Wara Plaza. Esto no hará ningún parche además de la lista de políticas BOSS. Para conectarse al resto de Pretendo Network, consulte Inkay.
Red Nintendo
Los parches de Nimble son temporales y solo se aplican en la memoria sin modificar la consola. Si tienes problemas para conectarte a Nintendo Network mientras usas Nimble, mantén presionado el botón ZL del control mientras enciendes la consola para omitir los parches.
Nimble ha sido creado por PretendoNetwork.
-
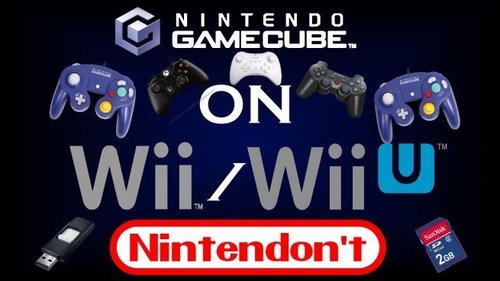
Nintendont
Un proyecto Wii Homebrew para jugar a juegos de GameCube en Wii y vWii en Wii U
Características:
Funciona en Wii y Wii U (en modo vWii) Carga a toda velocidad desde un dispositivo USB o una tarjeta SD. Carga 1:1 e imágenes de disco .GCM/.ISO reducidas. Carga juegos como archivos extraídos (formato FST). Carga imágenes de disco en formato CISO. (formato uLoader CISO) Emulación de tarjeta de memoria Reproducción de audio mediante transmisión de audio de disco Compatibilidad con mandos Bluetooth (mando clásico (Pro), mando Wii U Pro) Compatibilidad con mandos HID a través de USB Disposición personalizada de los botones al usar mandos HID Compatibilidad con códigos de trucos Configuración modificable de varios ajustes Reinicio/apagado mediante combinación de botones (R + Z + Start) (R + Z + B + D-Pad Abajo) Parcheo avanzado de modo de vídeo, forzar progresivo y forzar pantalla ancha 16:9 Arranque automático desde el cargador Cambio de disco Utiliza el adaptador oficial del mando de Nintendo GameCube Emulación BBA (ver Léame Emulación BBA) Funciones: (sólo Wii)
Reproducción de discos Reproducir copias de seguridad de DVD grabables (sólo Wii antigua) Utiliza tarjetas de memoria reales Cable GBA-Link WiiRd Permitir el uso del micrófono de Nintendo GameCube Lo que Nintendont nunca apoyará
Game Boy Player Instalación rápida:
Consigue el archivo loader.dol desde aquí mismo, renómbralo a boot.dol y ponlo en /apps/Nintendont/ junto con los archivos meta.xml e icon.png. Copia tus juegos de GameCube en el directorio /games/. Los subdirectorios son opcionales para los juegos de 1 disco en formato ISO/GCM y CISO. Para juegos de 2 discos, debes crear un subdirectorio /games/MYGAME/ (donde MYGAME puede ser cualquier cosa), y luego nombrar el disco 1 como "game.iso" y el disco 2 como "disc2.iso". Para los FST extraídos, el FST debe estar ubicado en un subdirectorio, por ejemplo /games/FSTgame/sys/boot.bin . Conecta tu dispositivo de almacenamiento a tu Wii o Wii U e inicia The Homebrew Channel. Selecciona Nintendont. Notas
Se sabe que la ranura para tarjetas SD de Wii y Wii U es lenta. Si estás usando una tarjeta SD y tienes problemas de rendimiento, considera usar un lector SD USB o un disco duro USB. Se sabe que las memorias USB dan problemas. Nintendont funciona mejor con dispositivos de almacenamiento formateados con clusters de 32 KB. (Utiliza FAT32 o exFAT). Nintendont es una aplicación creada por FIX94.
-
NKit
NKit is a Nintendo ToolKit that can Recover and Preserve Wii and GameCube disc images
Recovery is the ability to rebuild source images to match the known good images verified by Redump
Preserve is the ability to shrink any image and convert it back to the source iso
NKit can convert to ISO and NKit format. The NKit format is designed to shrink an image to it's smallest while ensuring it can be restored back to the original source data. NKit images are also playable by Dolphin
by nanook.
-
NUSspli
NUSspli es una aplicación que nos permite instalar contenido directamente desde los servidores de actualización de Nintendo a nuestra Wii U.
Características:
Descargar juegos desde los servidores de Nintendo (NUS). Instalar juiegos descargados tanto en el almacenamiento interno de la consola como en una memoria externa. Buscar tickets en NUS y "esa web de juegos". Crear tickets fake a voluntad o si no los encuentra. Mostrar la velocidad de descarga. Teclado en pantalla. Es capaz de descargar cualquier cosa disponible en NUS. Soporte completo para el menú HOME. Nombres de carpeta personalizados para los juegos descargados.
Cómo usar NUSspli
Para descargar un juego, realiza la búsqueda en "Title Database" por el ID de un juego (por ejemplo: base de datos WiiUBrew) Para crear un ticket fake necesitarás el Title ID y la clave de encriptación (disponible en "ese sitio de claves de juegos"). Para instalar la aplicación, descárgala desde esta misma página, descomprime el archivo y, dependiendo de donde vayas a ejecutar la aplicación, sigue los siguientes pasos:
Homebrew Launcher
Mueve la carpeta a SD:/wiiu/apps/ Ejecuta la aplicación desde el Home Brew Launcher a través de Haxchi, Browserhax o cualquier otro exploit compatible. Home Menu
Instala un Custom Firmware. Mueve la carpeta a SD:/install e instalalá con WUPInstaller. Ejecútala desde el menú HOME. Info
NUSspli está basada en WUPDownloader de Poke303.
La aplicación ha sido creada por V10lator.
-
Payload Loader
This is a generic payload loader for the Wii U to load arbitrary from the SD Card.
Currently it's hardcoded to loads a .elf file from sd:/wiiu/payload.elf.
Preconditions
This loader expects:
to be able to run at 0x011DD000 (and copied to this place and then executed). to be running inside Mii Maker (for the SD card access), the common kern_write (0x35) and kern_read (0x34) syscalls installed (hooks on 0x0xFFF02234 (write) / 0x0xFFF02214 (read) on FW 5.5.0+) the 0x09 syscall installed which is expected to be a function manipulate IBAT0 (extern void SC_0x09_SETIBAT0(uint32_t upper, uint32_t lower);) Running in any other application with sd access may also work, the IBAT0 setup may be to be adjusted though (set back to orignal values at the end)
Usage
A common usage for this would be to exploit an application, do a kernel exploit to be able to have kernel read/write, somehow copy the sections of the payload loader .elf file to the expected destination in memory fulfill the mentioned preconditions.
After that, simply put the .elf to be loaded in sd:/wiiu/payload.elf
The loaded .elf needs to be statically linked somewhere between 0x00800000 and 0x01000000. This whole area is has rwx for both, user and supervisor (kernel) mode and can be used.
This mapping only lasts for this exeuction! As soon as you leave the running application (in this case the Mii Maker), the mapping will be reset and you will loose access to the 0x00800000 region.
Compiling
In order to be able to compile this, you need to have installed devkitPPC with the following pacman packages installed.
pacman -Syu devkitPPC
Make sure the following environment variables are set:
DEVKITPRO=/opt/devkitpro DEVKITPPC=/opt/devkitpro/devkitPPC Technical details
This payload loader is supposed to loaded somewhere between 01000000..01800000 (virtual address), 0x011DD000...0x011E0000 should be free to use. The 0x09 syscall is used to set IBAT0 to map 01000000..01800000 (virtual address) to 32000000..32800000 (physical address) with r/w for user and kernel. This includes the region where payload loader is, and allows us to register and execute kernel syscall. This setting is meant to match the orignal IBAT0 values (at least in Mii Maker), but with r/w for the kernel. Resetting is not needed when using the Mii Maker, but may be needed to be adjusted. Afterwards it's possible to register an own syscall (we use 0x36 as it's unused) to setup IBAT4 and DBAT5 to make 00800000..01000000 (virtual address) to 30800000..31000000 (physical address) with r/w for user and supervisor. This allows full user/kernel access to this region, for data and code. The mapping is done for all 3 cores. Credits
orboditilt dimok789: Most parts (especially sd loading, elf copying) are based on the homebrew launcher sd loader. by wiiu-env.
-
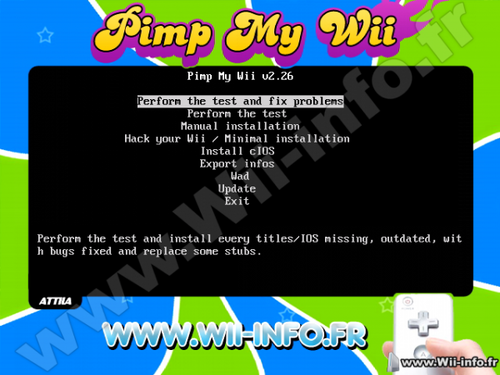
Pimp my Wii
Here is "Pimp My Wii", an homebrew that will Hack your Wii, install missing or outdated IOS / titles, install the cIOS and mIOS necessary.
The program will detect missing or outdated IOS and check that you have the latest version of the Wii System Menu. It also checks if you have the latest versions of BC, MIOS and those channels : Wii Shop, News, Weather, Mii, Photo and Photo 1.1
If you don't have the latest versions of those titles, the program will download them, or read them from USB or SD to install them. When using this program, you will have all advantages from 4.1 cumulated from those of 3.2, and this without drawbacks !
It also install cIOS d2x (based on Waninkoko) (249, 250) v10 and 10 alt and cIOS from Hermes 202/222/223/224 rev5.1. You can if you want install the cIOS from
Waninkoko rev20/21 or d2x v6, 7, 8 or 9beta (you'll have to install it manually from the menu "Install cIOS").
Pimp install the cMIOS from WiiGator.
Pimp will avert you if some homebrews aren't updated. Pimp check the version of the following homebrew (the dirnames must match, and are not case sensible) :
-> Neogamma, in version R9 beta 50 minimum. Dirname : neogamma -> Usb Loader gx, in version 2.2 minimum. Dirname : usbloader_gx -> Uloader, in version 5.1 minimum. Dirname : uloader -> Wiiflow, in version 2.2 (or r302) minimum. Dirname : wiiflow -> Configurable usb loader, in version 70 minimum. Dirname : usbloader or usbloader_cfg Pimp does not update those homebrews itself. No verification will be made on channels, only on the files installed on the SD card in the directory /apps/.
The homebrew is displayed automatically in english, french, italian, german or spanish depending of your Wii's language. It is also compatible with NTSC-U, NTSC-J and PAL Wii consoles. (Korean Wii theoricaly compatible).
Warning: I do not take any responsibility for any damage in your wii because of a improper usage of this software.
Menu:
- Pass the test and fix problems
Check if everything is alright on the Wii, and install what need to be installed, after asking user.
- Pass the test
Only check if everything is alright on the Wii, without installing anything.
- Manual installation
Will propose to install every IOS and titles possible.. By default, the installation will be on "no".
- Hack te Wii/Minimal installation
Pass the test and only install the minimal requirement to hack your Wii. It patch IOS 36.
Also install the cIOSes 249, 250, 202, 222, 223, 224 from d2x and Hermes and the cMIOS.
- Install cIOS
Install a cIOS of your choice between cIOS from Hermes, Waninkoko and Waninkoko d2x. You can choose the IOS source of your choice, the destination slot and the revision.
For Waninkoko's/d2x cIOS, you can choose this IOS source: IOS36 v3607 IOS37 v5662 IOS38 v4123 IOS53 v5662 IOS55 v5662 IOS56 v5661 IOS57 v5918 IOS58 v6175 IOS60 v6174 IOS61 v5661 IOS70 v6687 IOS80 v6943 (IOS 58 only for revision above 20).
For Hermes cIOS, you have the choice between IOS60 v6174, IOS38 v3867, IOS37 v3869 and IOS57 v5661.
Button "minus", "safe mode". In this mode, the IOS test is disabled, you will be asked instead to choose an IOS to use for the installation. You must know that in this mode, you will not know if your installed IOS have the differents bugs, and then the program will not know if they need to be patched.
Note: Pimp my Wii is compatible with the WiiU Wii emulator, but some options are disabled. Moreover, you absolutely need to place the wad files on your SD/USB device because the IOS for the WiiU can't be downloaded directly.
----------------------------------------------------
--------Correction of encountered problems----------
----------------------------------------------------
Here is a lit of common problems that you could have on your Wii (even on latest version) and the solutions that "Pimp My Wii" will do.
- Black screen at loading of dvd games :
Missing IOS -> Install those IOS (patching them)
- The Wii asks for an upgrade when inserting games :
Old IOS -> Update those IOS (patching them).
- A modified game (trucha signed) can't load on the disc channel with my modchip :
The IOS used by game has the trucha bug corrected -> Install a new IOS and patch the bug inside.
The IOS used by system menu has the trucha bug corrected -> Install a new IOS and patch the bug inside.
- The preloader and other homebrew does not work :
The IOS36 has the ES_Identify patched -> Install a new IOS 36 and patch the bug.
- I got reading problems with my backup launcher :
Old cIOS installed (older than rev20) -> Ask user to update this.
- No SD menu, no latest functionnality :
Old version of Wii (system menu, by example 3.2) -> Upgrade to 4.1 (but patching everything) for more compatibility, functionnality.
- The Wii Shop ask me to update :
Old version of Wii Shop (older than v20) -> Upgrade to this version (and install IOS 56 associated).
- I don't have any IOS that has the trucha bug (if you have a virgin Wii) :
The homebrew put the trucha bug back in IOS15.
- I can't install the Hackmii Install, because I have some kind of cIOSCorp :
You need a unmodified IOS 58 -> Install this IOS.
!!!!!!!!!Leave the parameters by default if you don't know what you do ! A bad choice of "hacks" could leave your system unstable!!!!!!!!!!!!
----------------------------------------------------
-----------------Questions / answers----------------
----------------------------------------------------
- Does it works without internet ? / I got errors during download, what can i do ?
It works without internet, you just need to put necessary wad files to the root of the SD card, or of a USB device in FAT32.
Follow this (french) tutoriel to get those files : http://www.wii-info.fr/article-53-comment-recuperer-un-ios-mios-chaine.htm
The necessary IOS are those, in their specific versions :
9 v1034, 12 v526, 13 v1032, 14 v1032, 15 v1032, 17 v1032, 21 v1039, 22 v1294, 28 v1807, 30 v2576, 31 v3608, 33 v3608, 34 v3608, 35 v3608, 36 v3608, 37 v5663, 38 v4124, 50 v4889, 53 v5663, 55 v5663, 56 v5662, 57 v5919, 58 v6175, 60 v6174, 61 v5661, 70 v6687 and 80 v6944.
And thoses "stub" IOSes, within their specific versions : IOS4v65280, IOS10v768, IOS11v10, IOS16v512, IOS20v12, IOS41v3607, IOS43v3607, IOS45v3607, IOS46v3607, IOS48v4124, IOS51v4633 and IOS254v260.
IOs must be named this way : IOSX-64-vY.wad, where X and Y are respectively the version and revision number.
To update the System Menu, you need the file RVL-WiiSystemmenu-vX.wad, where X is 448 for 4.1J, 449 for 4.1U, 450 for 4.1E and 454 for 4.1K.
For Wii Shop, you need RVL-Shopping-v20.wad
For bc, RVL-bc-v6.wad
For MIOS, RVL-mios-v10.wad
For other channels, XY-NUS-vZ.wad, where X is the "type", Y the number and Z the version. By example for Mii Channel it's 1000248414341-NUS-v6.wad (or RVL-NigaoeNR-v6.wad).
For the cIOS installation:
- cIOS 249 : IOS 56 rev 5661
- cIOS 250 : IOS 57 rev 5918
- cIOS 202 : IOS 60 rev 6174
- cIOS 222 : IOS 38 rev 3867
- cIOS 223 : IOS 37 rev 3869
- cIOS 224 : IOS 57 rev 5661
- I got the preloader, will it work ?
If you are not in 4.1 and if you accept the installation of this system menu, you will need to reinstall the preloader and the specifics hacks to this version. Follow this (french) tutoriel to install and configure preloader : http://www.wii-info.fr/article-52-installer-et-configurer-le-preloader.htm
- I have the preloader and i got "system files are corrupted", what can I do ?
If you have the preloader, you must patch "ES_Identify" on the IOS used by this. For Wii 4.x, it's IOS60, else it's IOS 30. Leave the parameters by default if you don't know what you do.
- I have a custom theme, will it stay ?
If you change your Wii version, you will lose all themes and you will need to reinstall a compatible theme with the version of System Menu you have.
- I have cIOSCorp or equivalent installed (to read backup games from disc channel), what will happened ?
If you install IOSes, it will replace those installed by cIOSCorp and you will loose the ability to launch games via disc channel without modchip. But cIOSCorp isn't recommanded, you just need a loader like Neogamma to read backups. If you reinstall cIOSCorp, you will get your old IOS back then Pimp My Wii will tell you that they are outdated
- Should I upgrade my console to 4.1 ? I thougt I must stay to 3.2 ?
If you use this program to put your console to 4.1, you will have exactly the same advantages as a 3.2 Wii, but you will have the improvements of 4.1. You won't have any disadvantages to put your Wii to 4.1.
- Should I install all IOS asked ?
It is recommanded to install IOS indicated as "not present" and IOS 30, 34, 36 and 60. You should also leave parameters by default. If you install at least those, you will avoid most of problems.
- The other IOS, are they useless ?
For other IOS, patching them help launching Trucha Signed gamed on Wii with a modchip.
- I got a message saying that my Custom IOS is outdated, what can I do ?
Follow this (french) tutoriel to upgrade your cIOS : http://www.wii-info.fr/article-40-installer-ou-desinstaller-un-custom-ios.htm
-
RetroArch for WiiU
RetroArch is a frontend for emulators, game engines and media players.
It enables you to run classic games on a wide range of computers and consoles through its slick graphical interface. Settings are also unified so configuration is done once and for all.
RetroArch has advanced features like shaders, netplay, rewinding, next-frame response times, and more!
-
RPX Gadget Finder
Needed for use Mario Kart 8 Exploit.
by wiiu-env.
-
SaveMii WUT Port
SaveMii WUT Port es una aplicación homebrew que permite hacer copias de seguridad de tus partidas guardadas de Wii U y vWii en la tarjeta SD y también restaurarlas. Se pueden hacer hasta 256 copias de seguridad por título. Las copias de seguridad se almacenan en sd:/wiiu/backups.
Para ordenar los títulos, pulsa R para cambiar el método de ordenación y pulsa L para cambiar entre descendente y ascendente.
Úsalo bajo tu propio riesgo y por favor informa cualquier problema que pueda ocurrir.
Notas rápidas
Muévete por la pantalla usando los botones Arriba/Abajo del pad direccional. Alterna entre las opciones usando los botones Izquierda/Derecha del pad direccional. "A" para seleccionar una tarea/ingresar a un menú. "B" para volver al menú anterior. Se puede acceder a funciones especiales usando los botones "X/Y/+/-", como se describe en la línea inferior de cada menú.
Gestión de títulos de Wii U / Gestión de títulos de vWii
Te permite hacer copias de seguridad/restaurar/borrar títulos individuales.
Primero selecciona el título que quieres gestionar. Títulos de Wii U: si el título no se ha inicializado (no has creado un juego inicial al jugarlo antes), se marcará como "No inicializado" y aparecerá en amarillo. Puedes intentar gestionarlo (restaurar desde una copia de seguridad anterior), pero el resultado es incierto. Se recomienda jugar primero y crear datos guardados "reales" antes de intentar restaurar cualquier copia de seguridad. Un caso especial de esto son las inyecciones vWii. Tienen un título de Wii U sin datos guardados que aparecerá en "Gestión de títulos de Wii U" marcado como "No inicializado", y un título vWii donde están los datos guardados del juego que aparecerá en Gestión de títulos vWii después de que lo juegues y crees un juego inicial guardado. Los datos guardados para estos títulos deben gestionarse desde las tareas de Gestión vWii. Por si acaso, Savemii te permite gestionar la parte del título de Wii U, pero normalmente no contiene ningún dato guardado. Selecciona la tarea que deseas realizar: Copia de seguridad: Copia los datos guardados de USB/NAND a SD Restaurar: Copia los datos guardados de SD a USB/NAND Borrar: Elimina los datos guardados de USB/NAND Exportar/Importar a Loadiine: Opciones heredadas para administrar los datos guardados de Loadiine Copiar a otro dispositivo: Si los datos guardados de un título están presentes en USB y NAND, cópialos de un almacenamiento al otro Copia de seguridad
Selecciona una ranura para almacenar los datos guardados. Puedes seleccionar cualquier número entre 0 y 255, cada uno representando una carpeta diferente en la tarjeta SD. Para los títulos de Wii U, selecciona qué datos guardar: Todos los usuarios: Opción recomendada. Realizará una copia de seguridad de todos los datos del juego. De usuario: xxxxxxxxx. Solo realizará una copia de seguridad de los datos del usuario/perfil especificado. En este caso, también debes especificar si deseas guardar los datos "comunes" o no. Los datos guardados "comunes" son datos compartidos por todos los perfiles. Los títulos pueden tener datos guardados comunes, datos guardados de perfil o ambos. Presiona "A" para iniciar la copia de seguridad. Una vez realizada la copia de seguridad, puedes etiquetar la ranura con un nombre significativo presionando el botón "+" mientras estás en el menú de copia de seguridad. Si la ranura no es necesaria, puedes eliminarla presionando el botón "-". Disposición de los datos guardados de los títulos de Wii U:
sd:/wiiu/backups/ xxxxxxxxyyyyyyyy/ # Title Id 0/ saveMiiMeta.json 80000001/ # one folder for each profile ... # savedata 80000002/ ... ... common/ ... 1/ # one folder for each slot ... SaveMii WUT Port ha sido creado por Xpl0itU.
-
SDCafiine Plugin
La principal característica de SDCafiine Plugin es la sustitución de archivos sobre la marcha, que puede utilizarse para cargar contenidos modificados desde medios externos (SD).
Se conecta a las funciones del sistema de archivos de la Wii U. Cada vez que se accede a un archivo, SDCafiine comprueba si existe una versión (modificada) en la tarjeta SD, y redirige las operaciones de archivo si es necesario.
Uso de SDCafiine
La ruta de SDCafiine ha cambiado a sd:/wiiu/sdcafiine
A través del menú de configuración del plugin (pulsa L, DPAD Down y Minus en el gamepad) puedes configurar el plugin. Las opciones disponibles son las siguientes:
Configuración: Habilitar SDCafiine: Con esta opción puedes activar/desactivar globalmente SDCafiine. Si estás ejecutando un juego, debes reiniciarlo para que esta opción tenga efecto. Configuración avanzada: Aplicar automáticamente el modpack si sólo existe un modpack: Omite la pantalla de selección de mods si el título actual sólo tiene un modpack para elegir. Para arrancar el juego sin mods, tienes que pulsar X mientras se muestra "Preparando modpack" en la pantalla. Omitir la pantalla "Preparando modpack... Omite la pantalla "Preparando modpack..." que aparece cuando se activa el arranque automático en un único modpack para un título. Para ejecutar el juego sin mods es necesario desactivar esta opción. Instalación de los mods
Antes de poder cargar los mods, es necesario copiarlos en una tarjeta SD. A continuación, "root:/" corresponde a la raíz de tu tarjeta SD. La estructura básica de la ruta de archivos es la siguiente
root:/wiiu/sdcafiine/[TITLEID]/[MODPACK]/content/ <-- para los archivos del juego. Se asigna a /vol/content/ root:/wiiu/sdcafiine/[TITLEID]/[MODPACK]/aoc/ <-- para los archivos DLC. Mapas a /vol/aoc/ Reemplaza lo siguiente:
"[TITLEID]" necesita ser reemplazado el TitleID de los juegos que deben ser modded. Una lista de ids de títulos se puede encontrar aquí (sin el "-"). Ejemplo para SSBU "0005000010145000". Asegúrese de utilizar el ID del juego completo y no el ID del título de actualización. "[MODPACK]" nombre del modpack. Ejemplo de ruta para la versión EUR de SuperSmashBros para Wii U:
root:/wiiu/sdcafiine/0005000010145000/SpecialChars/content/ <-- para los archivos del juego. Se asigna a /vol/content/ root:/wiiu/sdcafiine/0005000010145000/SpecialChars/aoc/ <-- para archivos de DLC. Mapas a /vol/aoc/ Para reemplazar el archivo /vol/content/movie/intro.mp4, pon un archivo modificado en:
root:/wiiu/sdcafiine/0005000010145000/SpecialChars/content/movie/intro.mp4 Manejo de múltiples paquetes de mods
SDCafiine admite varios mods diferentes para un mismo juego en la misma tarjeta SD. Cada modpack tiene su propio subdirectorio. Ejemplo:
sd:/wiiu/sdcafiine/0005000010145000/ModPack1/content/ sd:/wiiu/sdcafiine/0005000010145000/ModPack2/content/ "Borrar" archivos a través de SDCafiine
Si un juego ya no debe ver o acceder a un archivo, es posible "borrarlo"/"ocultarlo" del juego sin eliminarlo realmente. El proceso es similar al de redirigir un archivo. Pero en lugar de crear un archivo de reemplazo con el mismo nombre, se crea un archivo vacío con el prefijo .deleted_.
Si quieres evitar que un juego acceda a /vol/content/assets/tree.bin tienes que crear este archivo en tu modpack.
root:/wiiu/sdcafiine/[TITLEID]/[MODPACK]/contenido/activos/.deleted_tree.bin
-
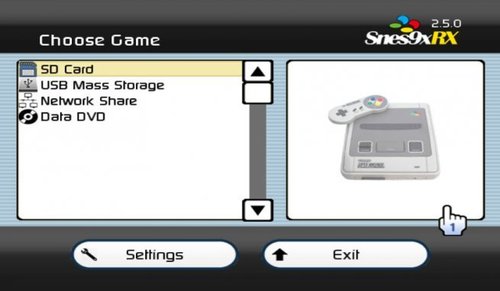
Snes9xRX
Snes9x RX is a Super Nintendo™ / Super Famicom emulator for the Nintendo Wii and Wii U. Snes9x RX is a fork from Snes9x GX, a port of Snes9x.
Snes9x RX is a "homebrew application" which means you will need a way to run unsigned code on your Nintendo Wii/Wii U.
Features
Based on Snes9x 1.52 Wiimote, Nunchuk, Wii Classic/Classic Pro, and Gamecube controller support Wii U Pro, NES and SNES Classic controller support SNES Superscope, Justifier, Mouse peripherals emulation support Cheat support Auto Load/Save Game Snapshots and SRAM Custom controller configurations SD, USB, DVD, SMB, Zip, and 7z support Autodetect PAL/NTSC, 16:9 widescreen support Original/filtered (Sharp & Soft))/Unfiltered video modes Turbo Mode - up to 2x the normal speed Zoom option to zoom in/out Open Source! -
Tiramisu
Tiramisu es un entorno heredado modular para Wii U. Ejecuta automáticamente un CFW (versión modificada de Mocha), permite iniciar el Homebrew Channel y proporciona un menú de inicio automático.
Junto con PayloadLoader, es una alternativa gratuita y modular a CBHC, con algunas funciones adicionales como compatibilidad total con el menú de inicio rápido del Gamepad y bloqueo de actualizaciones.
Uso de Tiramisu
Coloque el 00_mocha.rpxde Mocha en la sd:/wiiu/environments/tiramisu/modules/setupcarpeta. Coloque el 50_hbl_installer.rpxinstalador de Homebrew Launcher en la sd:/wiiu/environments/tiramisu/modules/setupcarpeta. Coloque el homebrew_launcher.elfdesde Homebrew Launcher en la sd:/wiiu/apps/homebrew_launchercarpeta. Coloque el 99_autoboot.rpxdesde AutobootModule en la sd:/wiiu/environments/tiramisu/modules/setupcarpeta. (opcional) Coloque cualquier módulo de configuración adicional sd:/wiiu/environments/tiramisu/modules/setupcomo Bloopair o USBSerialLogger . En el primer arranque se abrirá el menú de arranque automático, navega con el gamepad hasta el título que quieras iniciar.
Presione Y para seleccionar el título de arranque automático. Mantenga presionado INICIO (+) en el Gamepad mientras inicia el entorno para forzar la apertura del menú de inicio automático. Tiramisu ha sido creado por wiiu-env.
-
UDPIH Nintendo Switch Payload
Esto es un payload para cargar UDPIH desde una Nintendo Switch sin parchear.
Instrucciones
Descargue el último udpih_nxpayload.bin e inyéctelo utilizando un inyector de carga útil. Inicie el gadget seleccionando Ejecutar el gadget UDPIH con el botón POWER. Créditos
Esto es básicamente una versión muy reducida de hekate con soporte para el gadget udpih, por lo que todos los créditos para la carga útil NX van a @CTCaer y todos los demás colaboradores de hekate.
Aplicación creada por GaryOderNichts.
-
Ultimate Wii U Hack Script
This is a set of batch scripts that automate many things.
Features
Wiivc Injector Script
Injection of Wii games, Gamecube, Wii homebrews and Wiivc Chan Booter thanks to a modified version of Wiivc Injector Script 2.2.6. Backup, restore and reset various parameters. Create a blacklist to prevent an injection from having the same Title ID. Injectiine
Injection of games NES, SNES, GBA, N64 and NDS thanks to a modified version of Injectiine. Backup, restore and reset various parameters. Create a blacklist to prevent an injection from having the same Title ID. Other features
Installation of required elements while using scripts (Java 8). Set up the necessary files for the basic Wii U hack, the v-wii hack, the Haxchi installation or the CBHC installation. For more information, see this page of the documentation. Creation of a web server to host the browser exploit locally for system versions 5.5.0, 5.5.1 and 5.5.2 of the Wii U. Unbrick the V-wii part, see this page of the documentation for more information. Block or allow the console firmware update by deleting / restoring the correct folder via Wup_server, see this page for more information on the changed folder. Known bugs:
The injection of a game via Wiivc Injector Script will crash or give a game that does not work if it is run from a medium formatted in FAT, FAT16 or FAT32. This problem can not be corrected because a temporary file is obligatorily more than 4 GB during the injection and therefore poses a problem on media formatted in FAT, FAT16 or FAT32. Using quotation marks or exclamation points in user input causes the script to crash. When a console output made by an "echo" is performed, this produces an error in the log file. The UTF-8 encoding seems to be the cause of this problem but I have not found how to solve it for now. In Wiivc Injector Script, if the Wii game is splited (except for "wbfs" files) and its path or name contains an accent or any other symbols refused by Wit, the script will not work, even with the attempted fix. errors. For now, the script for extracting the MLC dump from Wii U nand does not allow extraction to a folder in a path with spaces and is forced to manipulate files that should not not be necessary but Wfs-extract does not seem to want paths with spaces, I'm looking for a solution. Credits:
There is really too much to thank for all the projects included in this script but I thank each contributor of these projects because without them this script could not even exist (some are credit in the documentation). I also thank all those who help me to test the scripts and those who suggest me new features.
by shadow2560.
-
Universal controller driver for Nintendont
Use your Switch Pro Controller, Xbox One Controller and more controllers wirelessly on Nintendont.
by Missingphy.
-
USB Descriptor Parsing Is Hard (UDPIH)
USB Descriptor Parsing Is Hard (UDPIH) aprovecha el análisis del descriptor de la pila del host USB de la Wii U. Se pronuncia como "mud pie" sin la M.
Requisitos
Una Wii U Uno de los dispositivos enumerados a continuación Nota: Cualquier otro dispositivo linux capaz de emular dispositivos USB también debería funcionar. Las versiones e instrucciones preconstruidas sólo están disponibles para la Pico y la Zero. Más adelante añadiré más dispositivos cuyo funcionamiento está confirmado. Dispositivos compatibles:
Una Raspberry Pi Pico o Zero Una Nintendo Switch sin parches capaz de ejecutar udpih_nxpayload Instrucciones
Pico
Descarga la última versión de UDPIH. Mantén pulsado el botón BOOTSEL de la placa y conecta el Pico a tu PC. Su PC detectará la Pi como un dispositivo de almacenamiento. Copie el archivo .uf2 en el Pico. Se desconectará después de unos segundos. El Pico está ahora flasheado y puede ser usado para udpih. Continúa con "Arrancando el recovery_menu" a continuación. Raspberry Pi Zero (Linux)
Instale las dependencias necesarias: sudo apt install build-essential raspberrypi-kernel-headers Clona el repo: git clone https://github.com/GaryOderNichts/udpih.git cd udpih
Descarga el último arm_kernel.bin.h de la página de versiones y cópialo en el directorio arm_kernel. Ahora construye el módulo del kernel:
cd linux make
Ahora puedes ejecutar sudo insmod udpih.ko para insertar el módulo del kernel en el kernel. El Cero está ahora listo para ser usado por udpih. Tenga en cuenta que tendrá que insertar el módulo de nuevo después de reiniciar la Zero. Necesitarás dos cables USB, uno para alimentar la Zero y otro para conectarla a la Wii U. Continúa con "Arrancar el recovery_menu" a continuación. Arrancar el menú de recuperación
⚠️ Notas importantes para que esto funcione: Asegúrate de que no hay otros dispositivos USB conectados a la consola. Utilice únicamente los puertos USB de la parte frontal de la consola, los puertos traseros no funcionarán. Si tu consola tiene activado el modo de espera, desconecta el enchufe y enciéndela desde un estado de arranque en frío completo. Copia la última versión del recovery_menu a la raíz de tu tarjeta SD formateada en FAT32. Inserta la tarjeta SD en la consola y enciéndela. En cuanto veas el logotipo de "Wii U" en el televisor o en el Gamepad, conecta tu Zero/Pico. Este momento es importante. Si ya estás en el menú, la hazaña no funcionará. Después de unos segundos deberías estar en el menú de recuperación. Aplicación creada por GaryOderNichts.
-
USBLoaderGX
Game backup loader for Wii and vWii
USBLoaderGX is a GUI for Waninkoko's USB Loader, based on libwiigui.
It allows listing and launching Wii games, Gamecube games and homebrew on Wii and WiiU vWii mode.
Its interface, based on the official theme from Nintendo Wii, is easy to use and perfect for kids and all the family. A lot of options are available and directly editable from the loader's interface.
by cyan06 & dimok789.
-
Uwizard
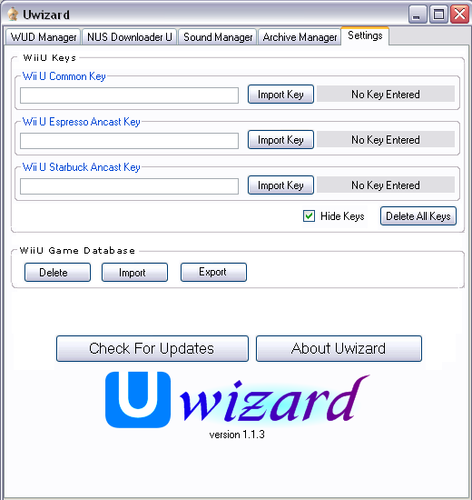
Uwizard is an all-in-one Wii U PC program.
Instructions:
To import a system key, open the settings tab, and enter the key in the text box, or click "Import" and select a .bin or.txt file that contains the key.
The open a WUD (Wii U disc image), open the WUD Manager tab, then click "Open Wii U Game Backup", then select your WUD file.
Uwizard will automatically download covers from http://www.gametdb.com/WiiU/List
You may also extract the contents of the game using Crediar's DiscU by clicking the "Extract Game Files" button.
To do this, you must enter the disc title key. Because of legal reasons, the keys are not included with Uwizard, but SHA-1 hashes are included for most games to help verify your keys.
To download a title from NUS, open the NUS Downloader U tab, then either type in the 16-character title ID, or choose a title from the list. The title version is optional. You may also decrypt and extract the contents of the title using Crediar's CDecrypt by checking the "Decrypt Contents" check box.
Use the "Add Title" button to add the currently entered title ID and version to the list. Use the "Delete Title" button to delete the selected item from the list. Use the "Clear List" button to remove all titles from the list. This includes titles that came pre-entered with Uwizard.
To decode a BFSTM Wii U sound stream to a WAV audio file, open the BFSTM Decoder tab, then click "Convert a BFSTM to a WAV", then select the input BFSTM and the output WAV. You may also display all BFSTM and WAV files within a folder in the list on the left by clicking "Select Folder".
In the settings tab, the "Check for Updates" button makes updating to the latest game list and Uwizard versions easy.
ChangeLog:
v1.1.3
German language added.
Spanish language added.
Minor bug fixes.
v1.1.2
BFWAV decoder added.
MP3 compiler added.
v1.1.1
SZS and SARC archive management added.
BFSTM multi-select and optional channel separation added.
Command line interface added.
More NUS titles added to the easy-access list.
Multiple languages added.
Minor bug fixes.
v1.1.0
NUS Downloader U added.
BFSTM decoder added.
List selection of Wii U games added.
Minor bug fixes.
v1.0.1
Option to hide keys added.
Minor bug fixes.
v1.0.0
Program Creation
Credits:
Mr. Mysterio - Programmer of Uwizard
Crediar - Programmer of DiscU and CDecrypt
MasterF0x - Distributor of BFSTM Decoder
GameTDB - Game Covers
VinsCool, capito27, Phanteon, send0r - Translation
-
vWii Nand Restorer
Restore your vWii NAND backups from your Wii U.
How to use
Copy your nand backup to sd:/vwiinandrestorer/slccmpt.bin and place your keys.bin/otp.bin in the same folder Copy the .elf to sd:/wiiu/apps Run cfw (mocha or haxchi) I recommend doing a slccmpt + otp backup with Wii U Nand dumper before using this tool.
Please make sure that the keys.bin/otp.bin are from the console where the NAND Backup is from or else decryption will fail!
Restore NAND
This will clear your SLCCMPT, extract the nand backup to your slccmpt and fix permissions
Additional Options:
Extract NAND
Extracts your NAND to sd:/vwiinandrestorer/extracted Clear SLCCMPT
This clears your SLCCMPT Copy extracted NAND to SLCCMPT
Copies everything from sd:/vwiinandrestorer/extracted to your SLCCMPT This can be useful if you have an already extracted NAND Backup that you want to restore Fix modes
This fixes the modes of your SLCCMPT Needed after copying file to the SLCCMPT by GaryOderNichts.
-
Wii DVD Channel
This channel has the OFFICIAL DVD icon the Wii uses, it spins around like on the Disc Channel and stuff.
I don't have pictures yet, I just got back on GBAtemp from a 2 month hiatus and realized I hadn't even released a beta yet..
I think the channel forwards to USBLoaderGX.
Feel free to extract the brlyt & brlans and modify & give credit 🙂
Thanks to @JGSHEW & Dariuz Wolf for helping me troubleshoot, and crediting Draconic NEO for having a similar idea.
by NewGBAXXL.
-
WiiFlow Lite
WiiFlow Lite es una aplicación homebrew de Wii usada para mostrar y lanzar los juegos y aplicaciones almacenadas en una memoria USB o tarjeta SD conectada a una Wii o una Wii U en modo Wii.
Los juegos y aplicaciones se muestran al estilo cover flow, como se puede ver en la siguiente imagen:
Instalación
Simplemente descarga el archivo desde aquí mismo y lo extraes en la carpeta apps/wiiflow_lite de tu tarjeta SD o memoria USB. Recomendamos memoria SD. El dispositivo debe de estar formateado en FAT32.
wfl_as_wiiflow debe de ser extraído en la carpeta apps/wiiflow.
Uso
Para iniciar WiiFlow Lite necesitas Homebrew Channel o canal ya creado de WiiFlow Lite en tu Wii o vWii system menu.
Aplicación creada por Fledge68.
-
Wiimote Emulator
Emulates a Bluetooth Wii controller in software.
Features
Emulate the Wiimote's many features and extensions Allows use of different input devices (keyboard etc.)
Build/Install
The following dependencies/packages are required (if not already installed):
libdbus-1-dev libglib2.0-dev libsdl1.2-dev Run the build script (in the project directory):
source ./build-custom.sh
Using the Emulator
Stop any running Bluetooth service, e.g.:
sudo service bluetooth stop
Start the custom Bluetooth stack (e.g. from the project directory):
sudo ./bluez-4.101/dist/sbin/bluetoothd
Run the emulator (in the project directory):
./wmemulator With no arguments, the emulator will listen for incoming connections (similar to syncing a real Wiimote). Pressing the sync button on a Wii should cause it to connect.
You can also supply the address of a Wii to directly connect to it as long as you have connected to it before (or you change your device's address to the address of a trusted Wiimote).
./wmemulator XX:XX:XX:XX:XX:XX
You will need to run the custom Bluetooth stack (as described above) whenever using the emulator (it won't persist after e.g. a device restart). Also, the custom stack generally won't be useful for anything besides Wiimote emulation.
To stop the custom stack and restore the original Bluetooth service, e.g.:
sudo killall bluetoothd sudo service bluetooth start by mconrad.
-
wiiSXR
PSX Emulator for Wii U & Wii.
QUICK USAGE:
ISOs can be .bin/.cue (Make sure .cue contains _relative_ directory!), .img, or .iso format To install: Extract the contents of wiiSXR-beta2.2.zip to the root of your SD card For SD/USB: Put ISOs (.bin/.cue or other formats) in the directory named /wiisxr/isos, All save types will automatically be placed in /wiisxr/saves For DVD: ISOs may be anywhere on the disc (requires DVDxV2 on Wii) For actual BIOS: Put SCPH1001.BIN in the directory on SD/USB named /wiisxr/bios Load the executable from the HBC or in the loader of your choice Once loaded, select 'Load ISO' and choose the source and select the ISO to load (Note: to go up a directory select '..', B will exit the file browser) Select 'Play Game' to play The game can be exited any time by pressing a configurable key combination together on a GC pad (START & X), Classic Controller (HOME), Wiimote (- & +), Wiimote+Nunchuck (1 & 2), or the reset button (Note: this must be done to save your game; it will not be done automatically) CONTROLS:
Controls are now fully configurable so any button on your controller can be mapped The controller configuration screen presents each PSX button and allows you to toggle through sources There are 4 configuration slots for each type of controller To load a different, previously saved configuration, select the slot, and click 'Load' After configuring the controls as desired, select the slot, and click 'Save' After saving different configurations to the slots, be sure to save your configs in the input tab of the settings frame Clicking 'Next Pad' will cycle through the PSX controllers assigned There is an option to invert the Y axis of the PSX's analog sticks; by default this is 'Normal Y' The 'Menu Combo' configuration allows you to select a button combination to return to the menu SETTINGS:
General Native Saves Device: Choose where to load and save native game saves Save States Device: Choose where to load and save save states Select CPU Core: Choose whether to play games with pure interpreter (better compatibility) or dynarec (better speed) Save settings.cfg: Save all of these settings either SD or USB (to be loaded automatically next time) Video Show FPS: Display the framerate in the top-left corner of the screen Screen Mode: Select the aspect ratio of the display; 'Force 16:9' will pillar-box the in-game display Input Configure Input: Select controllers to use in game Configure Buttons: Enter the controller configuration screen described above Save Button Configs: Save all of the controller configuration slots to SD or USB Auto Load Slot: Select which slot to automatically be loaded for each type of controller Audio Disable Audio: Select to mute the sound Saves Auto Save Native Saves: When enabled, the emulator will automatically load saves from the selected device on ISO load and save when returning to the menu or turning off the console Copy Saves: Not yet implemented Delete Saves: Not yet implemented CREDITS:
* WIISXR fork: mystro256 * WIISXR logo: iiiGerardoiii * General Coder: emu_kidid * Graphics & Menu Coder: sepp256 * Audio & Core Coder: tehpola * Artwork: drmr * USB 2.0 support: matguitarist * LibWUPC integration: Daxtsu * LibWUPC: https://github.com/FIX94/libwupc * pcsx team http://www.pcsx.net/ * pcsx-df http://pcsx-df.sourceforge.net/ * pcsxr http://pcsxr.codeplex.com/ * pcsx 1.5-test3 mac version by Gil Pederson http://pcsx.gpost.dk/ * P.E.Op.S. PSX Gpu & SPU http://sourceforge.net/projects/peops/ * franspu * CDRMooby * SSSPSX * Compiled using devKitPro -
WiiU Homebrew Launcher
The Homebrew Launcher is a WiiU homebrew that lists homebrew applications located on a SD card and permits launching them (similar to the Homebrew Channel of the Wii).
Usage
To use the Homebrew Launcher (or HBL, for short) you must copy homebrew_launcher.elf into SD:/wiiu/apps/homebrew_launcher/homebrew_launcher.elf, and run the installer throught your WiiU browser.
The apps that will be listed are should be in the following path /wiiu/apps/homebrew_name/some_elf_name.elf on the root of the SD card. A meta.xml and an icon.png (256x96) are optional. Here is an example:
sd:/ wiiu/ apps/ homebrew_launcher/ homebrew_launcher.elf meta.xml icon.png loadiine_gx2/ loadiine_gx2.elf meta.xml icon.png ddd/ ddd.elf meta.xml icon.png ftpiiu/ ftpiiu.elf meta.xml icon.png by dimok789.
-
wiiuhaxx_common
ROP-chain-generator for Wii U PowerPC-userland exploits.
This fork is supposed to be a common base for Wii U ROP-chains.
This is a common codebase for generating ROP-chains/etc for seperate Wii U PowerPC-userland exploits. This uses addresses auto-located from coreinit, with .php for each sysver that was pre-generated. This is basically a Wii U version of 3ds_browserhax_common.
Currently only binary ROP-chains are supported, hence no support for using this easily with WebKit exploits. The core1-switch ROP here doesn't work correctly currently, hence this codebase isn't usable as-is unless the current core is already core1(which isn't the case for WebKit exploits it seems). In other words, this codebase is currently only usable with non-WebKit exploits. Hence the use of php, this is intended for running under browser-based titles, but could be used with others as well if the ROP-chain(s) are usable with them.
You must specify the "sysver={val}" URL parameter for pages using this codebase, for selecting your Wii U system-version:
"532": 5.3.2 "540": 5.4.0 "550": 5.5.0 / 5.5.1 Usage
This codebase uses config/etc names from the 3ds repo mentioned above.
If the exploit .php has to select a sysver without using the value selected with via the URL param, that could be done with the following for example(prior to using the require_once() for the common .php): "$sysver = 550;" DO NOT set $sysver to any data directly specified by the user.
The $ropchainselect field determines which ROP-chain to use. Only one ROP-chain is implemented currently. When this param isn't specified, the codebase will select the default ROP-chain(val1).
The default ROP-chain does the following(only usable with titles which have codegen access):
Runs the core1-switch ROP(see above). Loads the codebin payload into the codegen/JIT area(with the required OSSwitchSecCodeGenMode() calls before/after), and does dcache/icache flushing/invalidation. Pops addresses into registers which the codebin could then use, see source. Jumps to the codebin payload. See source. The memory address of the codebin payload is required, see below. If the payload isn't guaranteed to always be at the exact same address all the time, storing a PowerPC NOP-sled right before the payload in memory is highly recommended(big-endian word value 0x60000000). The output of wiiuhaxx_generatepayload() is: wiiuhaxx_loader followed by the actual payload, with 4-byte alignment for the total size(see below).
Also note that this codebase itself does not need the address where the initial ROP-chain is located at all.
Example that the exploit .php can use:
<?php ... require_once("wiiu_browserhax_common.php"); ... $generatebinrop = 1; $payload_srcaddr = <address of payload codebin>; $ROPHEAP = <some valid address the ROP can use for storing tmp data>;//Such as the following: $payload_srcaddr-0x1000. generate_ropchain(); ... $payload = wiiuhaxx_generatepayload();//Binary codebin, include this in the output exploit so that it lands in memory usable by the ROP. if($payload === FALSE) { header("HTTP/1.1 500 Internal Server Error"); die("The payload binary doesn't exist / is invalid.\n"); } ... else if($i<{targetoffset}) { $writeval = $ROP_POPJUMPLR_STACK12;//ROP NOP-sled. } else if($i=={targetoffset}) { $con.= pack("N*", $ROP_POPJUMPLR_STACK12); $con.= pack("N*", 0x48484848);//If LR ever gets loaded from here there's no known way to recover from that automatically, this code would need manually adjusted if that ever happens. $i+= 0x8; $con.= $ROPCHAIN; $i+= strlen($ROPCHAIN)-4; //Verify that the $ROPCHAIN isn't too large somewhere in here. continue; } ... ?>
A config file located at "wiiuhaxx_common_cfg.php" is also required.
$wiiuhaxxcfg_payloadfilepath is the filepath for the actual codebin payload to run, this will be loaded to codegen+0. $wiiuhaxxcfg_loaderfilepath is the filepath for wiiuhaxx_loader.bin. This loads the above payload, since due to the NOP-sled the initial code which runs(wiiuhaxx_loader) won't (always) land at codegen+0. This can be built by running the following: "make OUTPATH={directorypath/filepath to copy the .bin to}". For example:
<?php $wiiuhaxxcfg_payloadfilepath = "<filepath for actual payload, such as wiiuhax_payload.bin, or for example: {projectdir}/bin/code550.bin>";//Remember that this is just an example, you can programmatically select the payload path by checking the request URL/etc if you want as well. $wiiuhaxxcfg_loaderfilepath = "<filepath for wiiuhaxx_loader.bin>"; $wiiuhaxxcfg_searchpayloadfilepath = "<filepath for wiiuhaxx_searcher.bin>"; ?>


